Hello, my Starlink Internet user friend.
Since you are here, I assume you are tired of your slow Starlink internet connection. You may have been troubleshooting your network issue but still have been unable to fix it, or you may have simply forgotten your Starlink wifi password.
And now, you need to reset your Starlink router.
But before you do that, you have to make sure you have no other way out, and this is your last resort. That is because resetting the router is the ultimate fix when nothing else is working.
Related: Check out our extensive review on Starlink Internet to know more about Starlink.
There could be several reasons why your Starlink internet is slow. Upon finding out the problem, based on that, you can find a solution. However, we won’t delve into that topic here.
To know more details about it, click here.
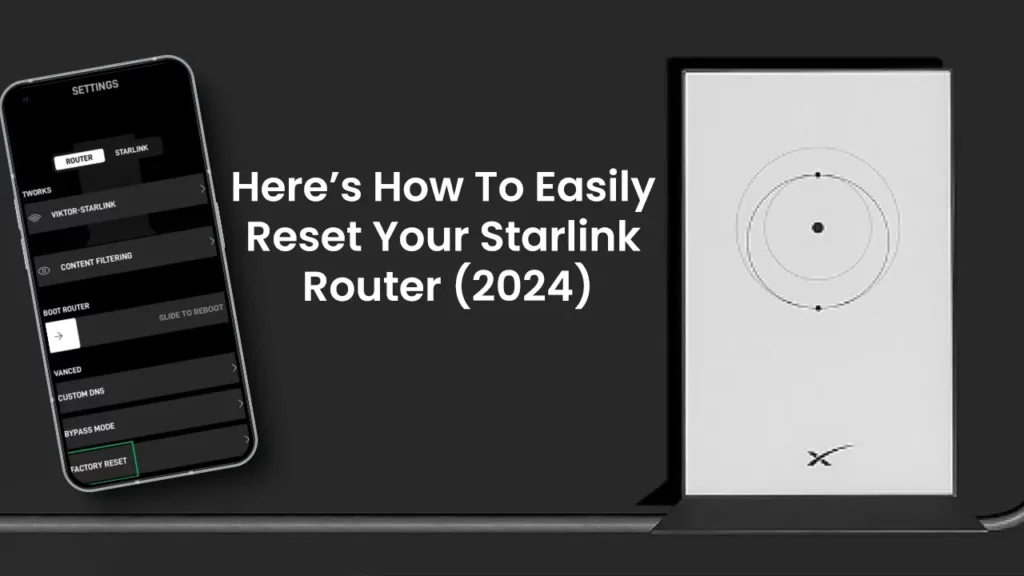
Now, let us directly address your problem and explain how you can reset your Starlink router.
It is a very easy process, and we are here to guide you step by step about it.
For resetting your Starlink router, you first need to figure out which Starlink router you are using.
Types of Starlink Routers:
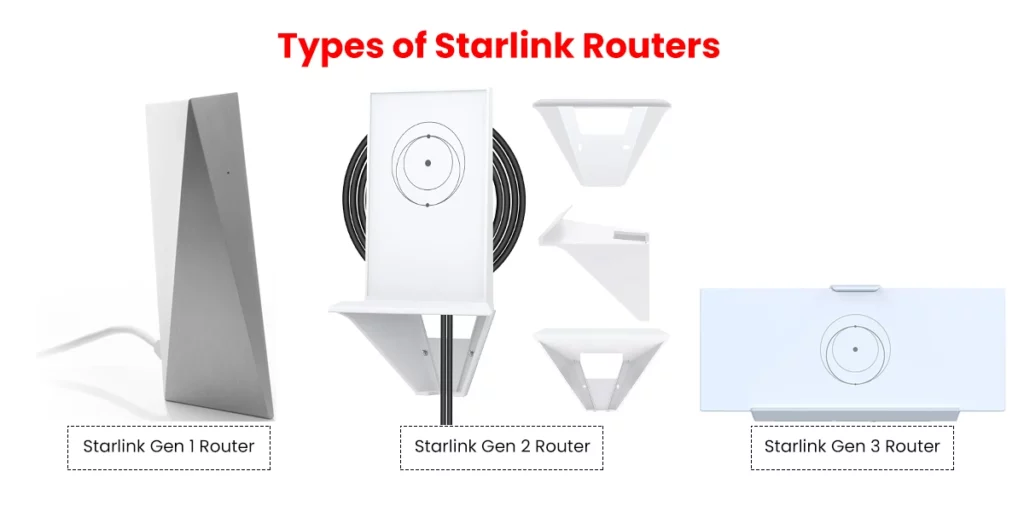
So, primarily, there are three generations of routers.
They are:
- Starlink Gen 1 Router.
- Starlink Gen 2 Router.
- Starlink Gen 3 Router.
And recently, as you all know, there has been one more inclusion in this segment.
Any guesses?
It is the Starlink Mini Router.
Although there is a significant difference in the resetting process of all different types of routers, there is nothing for you to worry about.
We are here to easily guide you on how to do it.
But, before we start, make sure you have the Starlink application downloaded on your mobile.
So, you must already know which Starlink router you have. In case you do not, you can simply search the internet and match the picture to figure out your Starlink router.
Now, we are all set to go and learn how to reset the Starlink router.
Using the Starlink App:
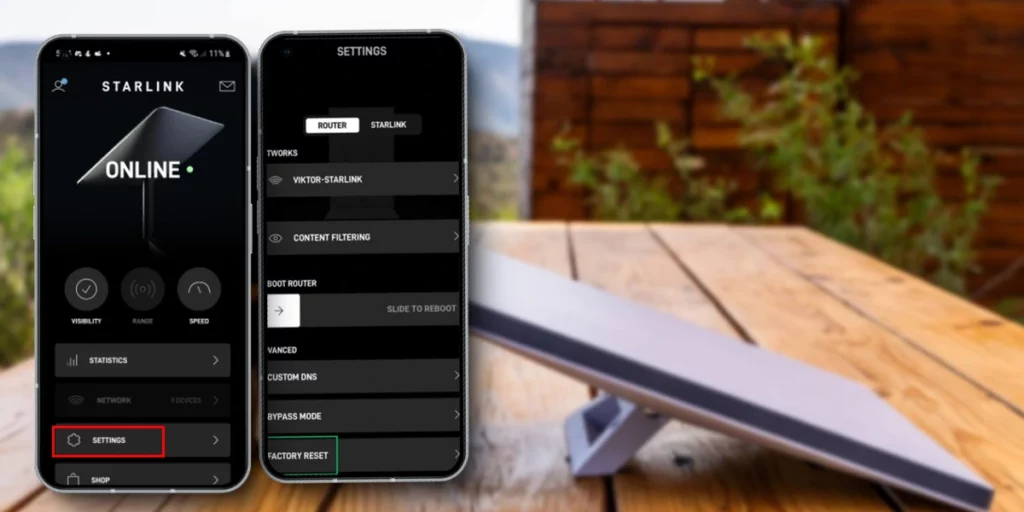
Open your Starlink app and make sure it is connected to the internet.
Next, go to “Settings.”
Then, click on “Router.”
You will find the option of “Factory Reset” there. Once you click on it, all you need to do is push that slider to the right to initiate the factory reset.
Note that this will not work if your router is in bypass mode.
| Settings > Router > Factory Reset |
Also, in case your Starlink router is not linked to your account or is connected to the internet, manual factory reset instructions will appear.
Let us now discuss the manual factory reset instructions.
Now that we have learned how to reset through the Starlink App, let us now understand how to manually reset the different routers of Starlink.
Resetting the Starlink Gen 1 Router:
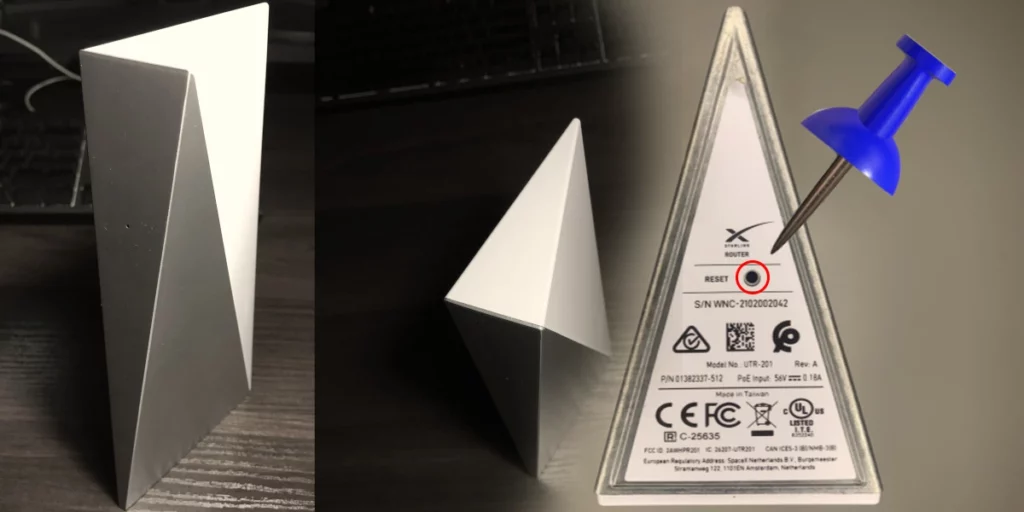
Well, I will have to say this is the easiest reset procedure, in my opinion.
Make sure to follow these steps properly:
- Firstly, flip over your Gen 1 router upside down.
- Notice the reset button there.
- Get a “Safety PIN” or anything similar.
- Using it, press the reset button.
- Stop pressing once the light turns white.
Within a few minutes, the reset process will be completed.
Once it is completed, you can connect to the wifi. The name by default will appear as “Starlink.”
All you need to do now is set up the network with a name and password.
Resetting the Starlink Gen 2 Router:
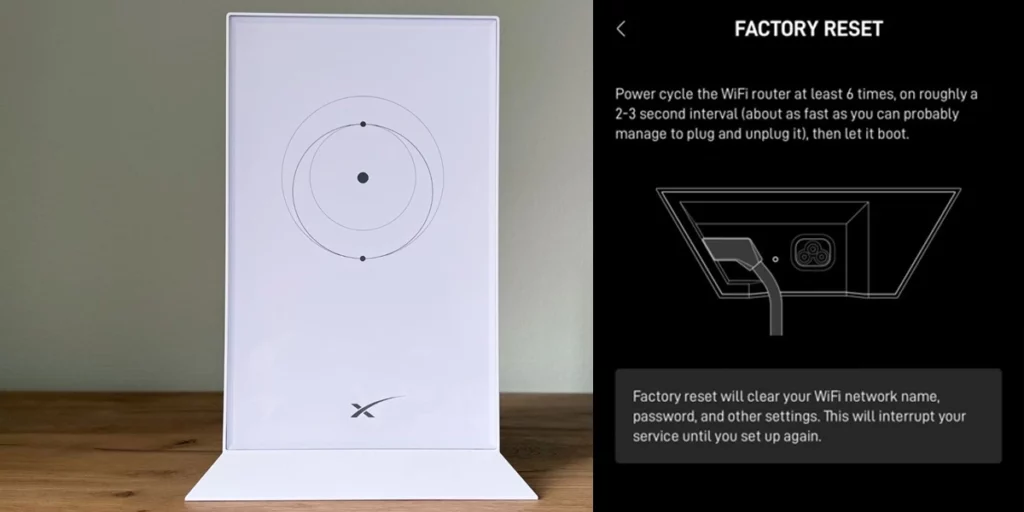
In the case of the Starlink Gen 2 router, the process is different from the other ones as there is no factory reset button. Although it is still easy.
- Move over to your Starlink router near the power cord and wall outlet.
- Now, you need to “Power Cycle” your Starlink router.
- To do that, unplug the router from power, and then in a few seconds plug it back again.
- Do this for 5 more times (i.e., 6 times in total).
Once down, wait for a few minutes for your router to reboot.
There you go; your resetting is done. Now set up the network with a name and password through the app.
Resetting the Starlink Gen 3 Router:
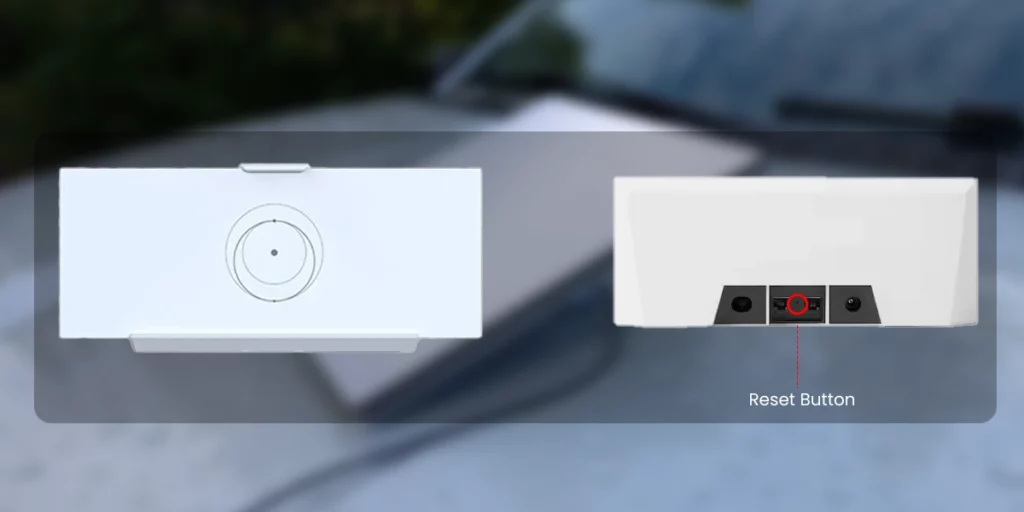
One good thing about the Starlink Gen 3 router has been the re-introduction of the “Factory Reset Button.”
Let me show you how to reset the Starlink Gen 3 router:
- Turn around your router to the backside.
- Between the two Ethernet ports (RJ45 ports), you will see a reset button.
- Just like the Gen 1 router, now get yourself a “Safety Pin” or anything similar.
- Use it to press the reset button.
- Release it once the light starts to blink white rapidly.
It will then take a few minutes to reboot.
Then you need to do what we have already learned.
Use the Starlink App to set up the network with a name and password to secure it.
Resetting the Starlink Mini Router:
Starlink Mini has been trending ever since its release in July.
Resetting the Starlink Mini Router is pretty much like a Gen 3 router.
- Look over to the back of the Starlink Mini Router, where you will see the reset icon.
- Now, firmly press it till you hear a click.
- Hold it for 3 seconds.
- You will see the LED blinking rapidly.
- It will ultimately shut off when resetting will be complete.
By now, you already know what to do next.
Set up your network with the Starlink App and secure it with a name and a password.
There you go. Now we have all learned how to reset your Starlink router, no matter which router you use.
Easy, isn’t it?
Final Thoughts
Come to think of it, the resetting process is not just easy; it is almost the same for all the routers except Starlink Gen 2.
- In the case of Starlink Gen 1, Starlink Gen 3, and Starlink Mini, the main aspect is that you just need to press the reset button through a pin or anything similar.
Reset Button Location:
- Starlink Gen 1: Bottom of the router.
- Starlink Gen 3: Back of the router
- Starlink Mini: Back of the router.
Note that-
Make sure to go through the process exactly the way we mentioned for each specific router.
- And finally, in the case of Starlink Gen 2, as we mentioned, although the process is different, it is still very easy. We just need to “Power Cycle”.
Head over to the “Resetting the Starlink Gen 2 Router” section to review it again.
As we conclude, I am affirmative we all learned how to reset our Starlink router. I will repeat once again that it is indeed a very easy process. Kindly let us know if you have any queries related to it.
For more such updates, stay tuned with us here at Netizen Pulse.

